PROFILE
 Hello. RAD-BOOMZ is all we know.
We are inspired by RED(RAD) and things that are shocking and nice(BOOMZ!) :D
The sky is full of dreams, but you don't know how to fly.
MY LIFE
We love RAD-BOOMZ! Because that's our group name. RAD-BOOMZ is made up of people from 2E3'2010 litreature group09! We are Yi Fang, Joyce, Russell, Wen Han, Weixun.
And yes, we love generalpercival as well
©Copyright Fion 2009. All Rights Reserved.
Saturday, April 17, 2010
A Mother's Love Is..
A mother's love is like an ocean,
Forever endless.
A mother's love is like the Sun,
Always warm and bright.
A mother's love is the greatest,
It can never ever be replaced.

Description of Picture:
The Sun represents the warmth of a mother's love.
The ocean represents the endless love of mothers.
The Heart IS a mother's love.
Done by:Russell(33) XD
8:23 AM
Nagging and scolding
Her way of expressing love
I love my mother
Painting:

Done by: Joyce (8) :D
6:25 AM
Tribute to mother
Painting

carnations in general symbolises women's love,
a pink carnation symbolises gratitude.
Poem
The flower of love
A symbol of gratitude
May's second sunday
Done by: WenHan :)
4:26 AM

Short Description: Nagging may be one of the way that mothers express their love and concern for their children. Mothers get angry over the children when they do something wrong is because they care about them.
Poem:
Mother mother love
Fierce yet loving, nags when caring
Beyond description
Done by : Yi Fang
3:04 AM
Friday, April 16, 2010
Mother's Warm Love.
A mother's love is warm,
it keeps us hot and strong.
It is like the Sun,
that keeps Earth going on.
On a starry night,
when dawn and dusk is near,
a mother's love is what you need,
to let you go through warm and tight.


Wei Xun. (24)
Description: My picture shows the warmth and love of a mother, as it can keep you warm when times are cold. The Sun represents the mother's warmth, which can be felt when it is cold. The night sky represents the cold times you have and it shows a boy falling into the Sun at night time. This shows that the boy is falling into the warmth of his mother when he is feeling cold.
7:20 AM
Thursday, April 15, 2010
A collage is a work of formal art, primarily in the visual arts, made from an assemblage of different forms, thus creating a new whole.
A collage may include newspaper clippings, ribbons, bits of colored or hand-made papers, portions of other artwork, photographs, a piece of moss or even a dead mole and other found objects, glued to a piece of paper or canvas. The origins of collage can be traced back hundreds of years, but this technique made a dramatic reappearance in the early 20th century as an art form of novelty.
We will be doing photo collage, or photo montage.
Collage made from photographs, or parts of photographs, is called photomontage. Photomontage is the process (and result) of making a composite photograph by cutting and joining a number of other photographs. The composite picture was sometimes photographed so that the final image is converted back into a seamless photographic print. The same method is accomplished today using image-editing software. The technique is referred to by professionals as compositing.
1 – Have A Rough Idea Of The Finished Montage Before You Start
It may work for the select few, but simply opening a Publisher document and throwing eight of your favourite pictures on there with no real idea of how you want the montage to look is unlikely to yield the best results. Think about montages you've seen and how you can achieve a similar look using the photos you want to use. This also gives you the opportunity to do any major work to photos that you want to use in its creation.
2 – Use The Right Size Document
Different canvas printing services do have different document size requirements so check with the printing service before you start. This kind of information can normally be found on their website, but you shouldn't hesitate to call if you're struggling to see it. It's always better for a document to be slightly too large than too small, because photos can lose quality when you increase their size but should retain the same level of quality when shrunk. Spurious results may certainly be achieved if you have to change the dimension ratio, though, so do check before you start.
3 – Combine New And Old Pictures To Create A Photo Journal
One of the greatest uses of a photo montage is in the creation of a photo journal. If you're chronicling an event or celebrating somebody's birthday then you can combine digital photos with scanned pictures. You can even include paper clippings, personally designed artwork, or flyers and invitations. Giving a montage a theme is a good idea, and this theme could be anything from a Valentines Day montage to a personal montage with pictures of yourself.
4 – Use Unique Montage Design Styles
One of the simplest and most common ways to combine pictures in a single photo montage is to overlap the edges of the photos a little. This prevents their being any gaps without removing any of the essential parts of the pictures you use. However, you could use a single picture as the background and then add photos in key areas of that background or use blended photo edges to create unique montage designs.
5 – If You're Struggling, Use Templates
Publisher and Photoshop are the two best applications for creating a photo montage of your own. Fortunately, templates and tutorials can be found all over the Internet for both applications but especially for Photoshop. Use a template or guide as a starting point and add your own personal touches at the end.
6 – If You're Still Struggling, Use A Professional Designer
If you're still struggling to get the look that you want from your photo montage then you can use a professional designer to do the work for you.

Done by:Weixun
7:36 AM
Sculpture is the art of conceiving a three-dimensional artwork. Sculptures can be formed by shaping any hard material, the most common being stone (either marble or granite), wood or metal. Sculpting artists with great sculpture ideas can also create sculptures using softer materials like clay or plastic that can be harden after they are shaped. Sculptures can also be made from rope, chain, wire or many other materials. Certain sculptors specialize in using other unusual or bizarre materials. They create contemporary sculptures that use traditional techniques but new materials.
Sculpture is one of the earliest known forms of art, with some sculptures dating back to the earliest known civilizations. Throughout the centuries sculpture has remained very popular as a way of teaching people lessons about morality and acceptable social interaction. It is also popular as means of expressing religious beliefs, decorating homes and useful objects, and as a way of remembering the dead.
In today's world, there are illustrations of sculptures from civilizations around the world that can be seen in museums or as part of landscaping outside buildings and in parks and gardens. People have used sculptures to ornament buildings and grounds for centuries. In fact, we often don't really notice how much sculpture there is around us, but if we begin to consciously take note of them, we would see ample examples of sculpture and sculpture ideas.
We will be working on polymer clay.Polymer clay is a man-made, non-toxic modeling material that works and feels like ceramic clay, but won't dry out when exposed to air. It's great for kids as well as adults.
Often, the clay you buy from the shelf is too soft for the sculptor to use immediately. While caners and bead makers usually like the clay soft, in the hands of a sculptor soft clay picks up too many unwanted impressions. The solution is to make the clay firmer by "leaching" (sometimes called "wicking") too-soft clay before beginning your sculpture. What you'll be doing is removing some of the liquid plasticisers from the clay beforehand. Here's how to do it: Using a pasta machine or non-stick rolling pin, roll out thin sheets of clay (approximately 1/8th inch thick). Sandwich them between white, untreated typing paper. Stack the paper/clay sandwiches and place a weight on the stack (a book will do). Check it after 2 to 3 days for firmness. If the clay is still too soft, change paper, and repeat until you're satisfied with the consistency.
Detailing tools can be as simple or complicated, as inexpensive or expensive as you decide. You can even make your own! I use a wide variety, ranging from dental hand tools, commercially available wax detailing tools, and many I've made myself. If you intend to do your work on the small scale I do, these are the tools I recommend you have to start with:
- A good work surface such as display or auto glass. Very durable and cool, it is easy to clean and your clay won't stick to the surface.
- A good pasta machine such as the Atlas made in Italy. I use mine to condition and blend clay and roll uniform sheets of clay for miniature cloth.
- The "Woodson 3" plastic filling instrument. This is a dental tool with a flat spatula at one end and a small, flattened knob at the other. My favorite tool, I use it to blend seams and create a smooth surface. Cost is about $12, or ask your dentist for an old one.
- Large and small aluminum knitting needles. With the blunt tips you can draw or impress lines in the clay without creating a rough edge. Rolling a large knitting needle over the surface of the clay will give you a very smooth finish and hide seams. Knitting needles size number 10 and larger are hollow. You can even cut them into tubes by rolling them back and forth under a knife blade, pack the tubes with clay, then fit a wire loop into the tube. After baking it, you have the perfect goudging tool. I have wire loops of many sizes to remove clay from crevices or to impress circular patterns into the clay.
- Sewing needles of all shapes and sizes. I've fitted them all with polymer handles so they are easier to hold. You can use them to draw very fine lines in the clay. If you lay the needle against the surface and drag it gently, you will be able to draw a smooth fine line, great for fur and feathers.
- A blade for cutting clay. This can be an unserrated knife or razor knife.
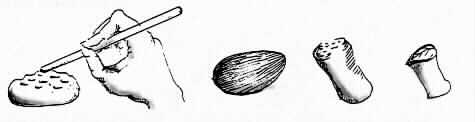
- examples of homemade detailing tools with polymer clay handles -

The most disheartening experiences a polymer clay sculptor can have are to create the perfect form and have it collapse in the oven, have delicate parts break after baking, or use so much clay the entire project fails. Those are the principle reasons for using internal armatures. I use two main armatures: wire and aluminum foil. Think of wire armatures as crude, sturdy skeletons for the portions of your sculpture that should be reinforced (e.g. thin limbs such as an arms outstretched, or legs in standing figures). The wires can be brass or steel and can be extended beyond the limb it supports to provide a convenient way to mount your sculpture to its base, or to secure it to an accompanying figure. The foil armature is used to reduce the amount of clay needed to complete a bulky figure and has the added advantages of reducing curing time and making the figure stronger. For bulky figures (eg. a toad or rabbit), I often begin with a well compressed ball of aluminum foil pounded into the general shape of the final form, then build the clay over the armature. A combination of the two kinds of armatures can be used.
Tip: Apply a polyvinyl glue (e.g. Sobo Glue) to armatures and let dry before applying clay to provide a strong bond between metal and clay.
4.Creating Textures:
Giving texture to a figure is one of the greatest challenges in creating a realistic piece. Whether the texture is fur, feathers, folds, or warts, the devil is in the detail. At first, you should experiment with direct etching, using the tools of the trade, perhaps etching fur or feather lines with a needle held so it drags along the surface, rather than gouging. The process can be tedious, but the act of creating these details teaches you a great deal. Once you have mastered the detailing for the piece you are sculpting, and. especially if you intend to reproduce it, the next logical step is to create direct surface application molds that will do the work for you. These molds (or stamps) are reverse images of the repetitive features you find in the subjects you sculpt and can be taken directly from your finished work or etched directly on the mold by hand. Not intended to "stamp out" the entire element of the sculpture, they recreate subtleties in texture. Impressing areas of a sculpture with a press mold made of polymer clay, saves time and effort. Here are some simple examples:
Done by: Weixun
7:24 AM
SYMBOLISM OF VISUAL ARTS
In the 1880's and 1890's, European artists experimented with work that had similarities with symbolist literature. When applied to visual arts, symbolism rejects direct representation of the material world in favour of allusion and suggestion. The aim of searching for more authentic ideas than those offered by material reality was in some sense similar to the traditional goal of idealisation long pursued by academic art. The symbolist artists imagined that their privileged subjective states were best expressed through allusive,non-natruallistic arrangements of line and colour.Symbolism was largely a reaction against naturalism and realism, anti-idealistic movements which attempted to capture reality in its gritty particularity, and to elevate the humble and the ordinary over the ideal. These movements invited a reaction in favour of spirituality, the imagination, and dreams; the path to symbolism began with that reaction.The notion that the artist was a seer or prophet who, in the words of the symbolist critic Camille Mauclair, "painfully saved our sickened souls from the excremental muck of materialism",was explicitly embraced by many artists in France who wished to be associated with symbolism.
The technical means by which symbolists pursued the idea was often quite innovative, however. In 1886, the symbolist critic Gustave Kahn offered a description of symbolism that lent itself to translation into visual media. Rather than portraying "the quotidian, the near at hand," as realist and Impressionist artists had done, symbolists "wish to be able to place the development of the symbol in any period whatsoever, and even in outright dreams (the dream being indistinguishable from life)." With this reference to Schopenhauer's theorization of the world as representation, Kahn proposed that symbolist artists or writers look inward for their subject matter: "The essential aim of our art is to objectify the subjective (the externalization of the Idea) instead of subjectifying the objective (nature seen through a temperament)." (L'Evénément, 28 September 1886). Kahn negated the naturalist writer Émile Zola's championing of the expression of individual temperaments and called for the externalization of the transcendent Idea.
EXAMPLES OF SYMBOLIST ART WORKS

Sonata of the Sea by Mikalojus Konstatinas Ciurlionis.
 The wounded angel by Hugo Simberg
CREDITS:
Done By: Russell Tan
6:29 AM
Tuesday, April 13, 2010
Because acrylics dry so fast, squeeze only a little paint out of a tube. If you're using a 'normal' plastic palette invest in a spray bottle so you can spray a fine mist over the paint regularly to keep it moist. 'Stay-wet' palettes – where the paint sits on a sheet of wax paper place on top of a damp piece of watercolour paper – eliminate the need to do this, but generally don't have a hole for your thumb so are more awkward to hold in your hand.
Acrylic Painting Tip 2: Blot your Brushes
Keep a piece of paper towel or cloth next to your water jar and get into the habit of wiping your brushes on it after you rise them. This prevents water drops running down the ferrule and onto your painting, making blotches.
Acrylic Painting Tip 3: Opaque or Transparent
If applied thickly – either straight from the tube or with very little water added – or if mixed with a little white, all acrylic colours can be opaque. If diluted, they can be used like watercolours or for airbrushing.
Acrylic Painting Tip 4: Acrylic vs Watercolour Washes
When an acrylic wash dries, it's permanent and, unlike a watercolour wash, is insoluble and can be over-painted without fear of disturbing the existing wash. The colours of subsequent washes mix optically with the earlier ones. A watercolour glaze can be lifted out using water and a cloth.
Acrylic Painting Tip 5: Think Thin When Thinking Glazes
If you want transparent glazes, these should be built up in thin layers; a heavy layer will produce a glossy surface.
Acrylic Painting Tip 6: Improve Flow Without Losing Colour
To increase the flow of a colour with minimal loss of colour strength, use flow-improver medium rather than just water.
Acrylic Painting Tip 7: Blending Acrylic Paints
Because acrylics dry rapidly, you need to work fast if you wish to blend colours. If you're working on paper, dampening the paper will increase your working time.
Acrylic Painting Tip 8: Hard Edges
Masking tape can be put onto and removed from dried acrylic paint without damaging an existing layer. This makes it easy to produce a hard or sharp edge. Make sure the edges of the tape are stuck down firmly and don't paint too thickly on the edges, otherwise you won't get a clean line when you lift it.
Acrylic Painting Tip 9: Washing-up Liquid with Masking Fluid
Masking fluid can be used with acrylics washes, as well as watercolours. Once masking fluid has dried in a brush, it's nearly impossible to remove. Dipping a brush into some washing-up liquid first makes it easier to wash masking fluid out of a brush.
Acrylic Painting Tip 10: Using Acrylic Paint as a Glue for Collage
Provided it's used fairly thickly and the item to be stuck isn't too heavy, acrylic paint will work as a glue in a collage.
SPECIAL ACRYLIC PAINTS
Acrylic paints are not to be used just for art canvas. Special acrylic paints have been developed for a variety of uses. For instance, one can now buy paints specifically for use on fabrics, totally washable and durable, giving one the option to add real flair to an otherwise plain piece of clothing. If one is involved with scrapbook and card making, why not add a personal touch to your projects with acrylic paint for paper? If you want to brighten up your kitchen and dining table, consider new acrylic paints for glass and china. This paint allows us to turn an ordinary piece of glass ware into an elegant and expensive-looking personal accomplishment. An added benefit is that this paint, when allowed to dry properly, will stay beautiful through many dishwasher cycles when loaded on the top rack. However, one thing we must be aware of is that this acrylic paint must not be applied in an area which touches the mouth or food.
LEARNING TO PAINT
Learning acrylic painting is not as daunting as it may seem. Many acrylic artists and instructors have developed their own methods, tools, techniques and instructions, making the learning process much easier. Donna Dewberry says that any one who can draw a stick figure can learn to paint using the One Stroke method which she developed, and which is so popular today. For those hesitant to try free-hand painting, stencils for all subjects and designs are available in various sizes, from very small to very large. Want to paint a mural on your wall? Use stencils and acrylic paints.
TUBES OR JARS?
When using acrylic paints, there are several points to keep in mind. These paints consist of pigment suspended in an acrylic polymer binder to which water has been added. They are available in tubes and in jars. The tube paint, as you probably know, is much thicker and can be used directly from the tube or diluted with water. Acrylic paint in jars has already been diluted to a 'flowing' consistency. Both are suitable paints and dry to a smooth, shiny finish. This is no surprise as acrylic paint is just that - acrylic, or more commonly, plastic.
EASY CLEAN-UP
Because acrylic paints are water-based, clean up is fairly easy. Soap and water is used, NOT turpentine or other paint thinners, but this must be done before the paint dries. Synthetic brushes are generally used as the alkaline in the paint is hard on brushes made from natural hair. You can ruin an expensive brush in a hurry if care is not taken. Brushes must be kept moist or cleaned immediately. Since, as mentioned before, these paints contain acrylics, despite the fact that they are water-based, once dry they are extremely hard, if not impossible, to remove from brushes.
Credits:
http://painting.about.com/od/acrylicpainting/a/10tips_acrylics.htm
http://www.lindasacrylicpaintingtips.com/
http://www.youtube.com/watch?v=YK3Bgc7-d_0&feature=fvst
Done by: Yi Fang, Joyce, Wen Han
3:05 AM
Impressionist motto - human eye is a marvelous instrument. Impact worldwide was lasting and huge.
IMPRESSIONISM
KEY DATES: 1867-1886
A French 19th century art movement which marked a momentous break from tradition in European painting. The Impressionists incorporated new scientific research into the physics of colour to achieve a more exact representation of colour and tone.
The sudden change in the look of these paintings was brought about by a change in methodology: applying paint in small touches of pure colour rather than broader strokes, and painting out of doors to catch a particular fleeting impression of colour and light. The result was to emphasise the artist's perception of the subject matter as much as the subject itself.
Impressionist art is a style in which the artist captures the image of an object as someone would see it if they just caught a glimpse of it. They paint the pictures with a lot of color and most of their pictures are outdoor scenes. Their pictures are very bright and vibrant. The artists like to capture their images without detail but with bold colors. Some of the greatest impressionist artists were Edouard Manet, Camille Pissaro, Edgar Degas, Alfred Sisley, Claude Monet, Berthe Morisot and Pierre Auguste Renoir.
Manet influenced the development of impressionism. He painted everyday objects. Pissaro and Sisley painted the French countryside and river scenes. Degas enjoyed painting ballet dancers and horse races. Morisot painted women doing everyday things. Renoir loved to show the effect of sunlight on flowers and figures. Monet was interested in subtle changes in the atmosphere.
While the term Impressionist covers much of the art of this time, there were smaller movements within it, such as Pointillism, Art Nouveau and Fauvism.
Pointilism was developed from Impressionism and involved the use of many small dots of colour to give a painting a greater sense of vibrancy when seen from a distance. The equal size dots never quite merge in the viewer's perception resulting in a shimmering effect like one experiences on a hot and sunny day. One of the leading exponents was Seurat to whom the term was first applied in regard to his painting 'La Grand Jette' (1886).
Seurat was part of the Neo-Impressionist movement which included Camille Pissarro, Paul Gauguin, Henri Matisse, Henri de Toulouse-Lautrec and Paul Signac. The word Divisionism describes the theory they followed while the actual process was known as pointillism.The effects of this technique, if used well, were often far more striking than the conventional approach of mixing colours together.
The Neo-Impressionist movement was brief yet influential. The term Divisionism was also the name of an Italian version of Neo-Impressionism in the 1890s and early 1900s, and one can trace a line to Futurism which was founded in 1909.
Credits:
http://www.artmovements.co.uk/impressionism.htm
http://www.huntfor.com/arthistory/c19th/impressionism.htm
Done by: Yi Fang, Joyce and Wen Han
3:00 AM
There are a few things to remember to maintain color harmony throughout your painting.
Limit your palette
Dipping into twenty different colors spread around your palette is tempting but usually results in a discordant, muddy work. Limit your colors to just two or three, particularly in the early stages of a painting. Your subject will dictate which ones to choose. I find for buildings, landscape etc. starting with washes of earth colours - Raw Sienna and Burnt Sienna plus a little Ultramarine or Indigo, depending on what sort of atmosphere you’re after, gives a tight harmonious foundation to work on. More intense colours can be carefully introduced later if necessary.
Foreign colors
How often do you look at a painting and see an area of colour that doesn’t seem to fit? A group of trees in an out of place green, a discordant blue river or a purple flower that seems to jump out of the bunch. The remedy to this problem is simple, introduce more of the discordant colour to the rest of the painting.
Tie up color
A few fine calligraphic lines in a harmonious color will usually tighten up a disjointed color arrangement. Use a #1 or 2 liner brush or pen and ink. It is important to use just one color for these lines or you run the risk of adding to the confusion. If you use ink, a fine spray of water quickly after the ink is applied, will soften the lines and create some interesting feathering effects.
Darks
Avoid neutral darks - a painting will have more life and character if the darks tend to either warm or cool. To mix a rich strong dark don’t use an opaque Yellow. Windsor & Newton Quinacridone Gold or Rowney Indian Yellow work best. Most other yellows make muddy darks.
CENTRE OF INTEREST
For a painting to be successful the centre of interest should be obvious and well positioned. Avoid placing the centre of interest in the middle of a painting (either horizontally or vertically) unless you are after a static, formal composition.
Keeping the centre of interest an unequal distance from each side helps position it correctly. Breaking the horizontal and vertical axis roughly in the ratio of 1:2 will also help to place the centre of interest
DRAWING TIPS
To produce successful paintings it is important to practice drawing
No matter what you are drawing it is important to first consider how your subject will be placed on the page. Small thumbnail sketches before you start your drawing are good way to work out the composition before you start your drawing.
Start your drawing by mentally reducing the subject to a few simple shapes. Sketch these in lightly and accurately, then proceed to break these up into smaller more detailed shapes. Don't start at one corner of the subject and work your way across to the other.
Your drawing will look better if the most interesting part ( called the centre of interest ) is not placed along either of the pages centre lines. The strongest tonal ( light / dark ) contrast should be placed at the centre of interest. Have some areas of the drawing less detailed than others. Try and keep most of the detail in the area of the centre of interest.
To gain confidence, practice drawing on large sheets of cheap paper with a soft (5B or 6B) pencil, charcoal, or pastel pencil. Stand up, work on a vertical surface (or surface at right angles to your line of vision) and move your arm from the shoulder. Work from large and bold to fine and detailed. Only the final finishing off needs to be done with small, tight hand movements.
Practice - It doesn't matter what you draw - you have to train your eye to accurately judge proportion and your hand to accurately convert these judgements to marks on paper. There are no shortcuts here, lots and lots of pencil shavings are the only answer.
Credits:
http://www.johnlovett.com/beginer.htm
http://www.youtube.com
Done by Joyce, YiFang and Wen Han :D
2:48 AM
1. A figure of speech in which two unlike things are explicitly compared, as in “she is like a rose.”Compare metaphor.
2. An instance of such a figure of speech or a use of words exemplifying it.
Metaphor
1. A figure of speech in which a term or phrase is applied to something to which it is not literally applicable in order to suggest a resemblance, as in “A mighty fortress is our God.”Compare mixed metaphor, simile (def. 1).
2. Something used, or regarded as being used, to represent something else; emblem; symbol.
Personification
1. The attribution of a personal nature or character to inanimate objects or abstract notions, esp. as a rhetorical figure.
2. The representation of a thing or abstraction in the form of a person, as in art.
3. The person or thing embodying a quality or the like; an embodiment or incarnation: He is the personification of tact.
4. An imaginary person or creature conceived or figured to represent a thing or abstraction.
5. The act of personifying.
6. A character portrayal or representation in a dramatic or literary work.
Rhyme
–noun
1. Identity in sound of some part, esp. the end, of words or lines of verse.
2. A word agreeing with another in terminal sound: Find is a rhyme for mind and womankind.
3. Verse or poetry having correspondence in the terminal sounds of the lines.
4. A poem or piece of verse having such correspondence.
5. Verse (def. 4).
–verb (used with object)
6. To treat in rhyme, as a subject; turn into rhyme, as something in prose.
7. To compose (verse or the like) in metrical form with rhymes.
8. To use (a word) as a rhyme to another word; use (words) as rhymes.
–verb (used without object)
9. To make rhyme or verse; versify.
10. To use rhyme in writing verse.
11. To form a rhyme, as one word or line with another: a word that rhymes with orange.
12. To be composed in metrical form with rhymes, as verse: poetry that rhymes.
Rhythm
–noun
1. Movement or procedure with uniform or patterned recurrence of a beat, accent, or the like.
2. Music.
a. The pattern of regular or irregular pulses caused in music by the occurrence of strong and weak melodic and harmonic beats.
b. A particular form of this: duple rhythm; triple rhythm.
3.measured movement, as in dancing.
4. Art, Literature. a patterned repetition of a motif, formal element, etc., at regular or irregular intervals in the same or a modified form.
5. The effect produced in a play, film, novel, etc., by the combination or arrangement of formal elements, as length of scenes, speech and description, timing, or recurrent themes, to create movement, tension, and emotional value in the development of the plot.
6. Prosody.
a. Metrical or rhythmical form; meter.
b. A particular kind of metrical form.
c. Metrical movement.
7. The pattern of recurrent strong and weak accents, vocalization and silence, and the distribution and combination of these elements in speech.
8. Physiology. the regular recurrence of an action or function, as of the beat of the heart, or the menstrual cycle.
9. Procedure marked by the regular recurrence of particular elements, phases, etc.: the rhythm of the seasons.
10. Regular recurrence of elements in a system of motion.
Done by Yi Fang, Joyce and Wen Han :D
2:37 AM
©Copyright Fion 2009. All Rights Reserved.
TAGBOARD
Talk to us personally, face-to-face. Hence, we dont see a need for tagboard :D .
©Copyright Fion 2009. All Rights Reserved.