PROFILE
 Hello. RAD-BOOMZ is all we know.
We are inspired by RED(RAD) and things that are shocking and nice(BOOMZ!) :D
The sky is full of dreams, but you don't know how to fly.
MY LIFE
We love RAD-BOOMZ! Because that's our group name. RAD-BOOMZ is made up of people from 2E3'2010 litreature group09! We are Yi Fang, Joyce, Russell, Wen Han, Weixun.
And yes, we love generalpercival as well
©Copyright Fion 2009. All Rights Reserved.
Thursday, April 15, 2010
Sculpture is the art of conceiving a three-dimensional artwork. Sculptures can be formed by shaping any hard material, the most common being stone (either marble or granite), wood or metal. Sculpting artists with great sculpture ideas can also create sculptures using softer materials like clay or plastic that can be harden after they are shaped. Sculptures can also be made from rope, chain, wire or many other materials. Certain sculptors specialize in using other unusual or bizarre materials. They create contemporary sculptures that use traditional techniques but new materials.
Sculpture is one of the earliest known forms of art, with some sculptures dating back to the earliest known civilizations. Throughout the centuries sculpture has remained very popular as a way of teaching people lessons about morality and acceptable social interaction. It is also popular as means of expressing religious beliefs, decorating homes and useful objects, and as a way of remembering the dead.
In today's world, there are illustrations of sculptures from civilizations around the world that can be seen in museums or as part of landscaping outside buildings and in parks and gardens. People have used sculptures to ornament buildings and grounds for centuries. In fact, we often don't really notice how much sculpture there is around us, but if we begin to consciously take note of them, we would see ample examples of sculpture and sculpture ideas.
We will be working on polymer clay.Polymer clay is a man-made, non-toxic modeling material that works and feels like ceramic clay, but won't dry out when exposed to air. It's great for kids as well as adults.
Often, the clay you buy from the shelf is too soft for the sculptor to use immediately. While caners and bead makers usually like the clay soft, in the hands of a sculptor soft clay picks up too many unwanted impressions. The solution is to make the clay firmer by "leaching" (sometimes called "wicking") too-soft clay before beginning your sculpture. What you'll be doing is removing some of the liquid plasticisers from the clay beforehand. Here's how to do it: Using a pasta machine or non-stick rolling pin, roll out thin sheets of clay (approximately 1/8th inch thick). Sandwich them between white, untreated typing paper. Stack the paper/clay sandwiches and place a weight on the stack (a book will do). Check it after 2 to 3 days for firmness. If the clay is still too soft, change paper, and repeat until you're satisfied with the consistency.
Detailing tools can be as simple or complicated, as inexpensive or expensive as you decide. You can even make your own! I use a wide variety, ranging from dental hand tools, commercially available wax detailing tools, and many I've made myself. If you intend to do your work on the small scale I do, these are the tools I recommend you have to start with:
- A good work surface such as display or auto glass. Very durable and cool, it is easy to clean and your clay won't stick to the surface.
- A good pasta machine such as the Atlas made in Italy. I use mine to condition and blend clay and roll uniform sheets of clay for miniature cloth.
- The "Woodson 3" plastic filling instrument. This is a dental tool with a flat spatula at one end and a small, flattened knob at the other. My favorite tool, I use it to blend seams and create a smooth surface. Cost is about $12, or ask your dentist for an old one.
- Large and small aluminum knitting needles. With the blunt tips you can draw or impress lines in the clay without creating a rough edge. Rolling a large knitting needle over the surface of the clay will give you a very smooth finish and hide seams. Knitting needles size number 10 and larger are hollow. You can even cut them into tubes by rolling them back and forth under a knife blade, pack the tubes with clay, then fit a wire loop into the tube. After baking it, you have the perfect goudging tool. I have wire loops of many sizes to remove clay from crevices or to impress circular patterns into the clay.
- Sewing needles of all shapes and sizes. I've fitted them all with polymer handles so they are easier to hold. You can use them to draw very fine lines in the clay. If you lay the needle against the surface and drag it gently, you will be able to draw a smooth fine line, great for fur and feathers.
- A blade for cutting clay. This can be an unserrated knife or razor knife.
- examples of homemade detailing tools with polymer clay handles -

The most disheartening experiences a polymer clay sculptor can have are to create the perfect form and have it collapse in the oven, have delicate parts break after baking, or use so much clay the entire project fails. Those are the principle reasons for using internal armatures. I use two main armatures: wire and aluminum foil. Think of wire armatures as crude, sturdy skeletons for the portions of your sculpture that should be reinforced (e.g. thin limbs such as an arms outstretched, or legs in standing figures). The wires can be brass or steel and can be extended beyond the limb it supports to provide a convenient way to mount your sculpture to its base, or to secure it to an accompanying figure. The foil armature is used to reduce the amount of clay needed to complete a bulky figure and has the added advantages of reducing curing time and making the figure stronger. For bulky figures (eg. a toad or rabbit), I often begin with a well compressed ball of aluminum foil pounded into the general shape of the final form, then build the clay over the armature. A combination of the two kinds of armatures can be used.
Tip: Apply a polyvinyl glue (e.g. Sobo Glue) to armatures and let dry before applying clay to provide a strong bond between metal and clay.
4.Creating Textures:
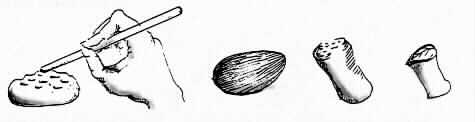
Giving texture to a figure is one of the greatest challenges in creating a realistic piece. Whether the texture is fur, feathers, folds, or warts, the devil is in the detail. At first, you should experiment with direct etching, using the tools of the trade, perhaps etching fur or feather lines with a needle held so it drags along the surface, rather than gouging. The process can be tedious, but the act of creating these details teaches you a great deal. Once you have mastered the detailing for the piece you are sculpting, and. especially if you intend to reproduce it, the next logical step is to create direct surface application molds that will do the work for you. These molds (or stamps) are reverse images of the repetitive features you find in the subjects you sculpt and can be taken directly from your finished work or etched directly on the mold by hand. Not intended to "stamp out" the entire element of the sculpture, they recreate subtleties in texture. Impressing areas of a sculpture with a press mold made of polymer clay, saves time and effort. Here are some simple examples:
Done by: Weixun
7:24 AM
©Copyright Fion 2009. All Rights Reserved.
TAGBOARD
Talk to us personally, face-to-face. Hence, we dont see a need for tagboard :D .
©Copyright Fion 2009. All Rights Reserved.